FAS Computer Services to Harvard University IT: (617) 495-7777.
- For scanning text documents, use
the "line art" settings. With about 100dpi (dpi= Dots Per Inch),
you should be fine. (A 17 inch monitor (12.5 inches horizontally) with
1024x768 dots creen size, then the image has a 1024 dots/12.5 inches = 82 dpi
resolution). Example: A 75 dpi scan resolution of a 450x300 picture leads
to a 400K color picture, 135 Graylevel picture and a 17K line art picture.
- To get a better printing quality, (and if the size of the
file does not matter so much), chose a higher dpi-rate (200 up to 600 dpi).
Remember that doubling the dpi-rate quadruples the size of the file.
Note that the printer dpi resolution (300x300, 360x360, 600x600,
720x720, or even 1440x720 now) are different than the picture resolution
Several ink dots are required to make one pixel image dot. The printer's
image resolution capability is less than the given dpi numbers.
- If the text has to be processed by a OCR software
(like for example Omnipage 8 for Mac or PC), use 300 dpi Line art. Don't scan
with a too high resolution because the OCR software can get problems with too
large files. Also for copy purposes (scan and print), 300 dpi Line art is ok.
- When scanning photos, scan it at a dpi-rate which is twice as big as it will
be actally used. Like this Moiré interference patterns can be eliminated.
These patterns appear when scanning from books, newspapers or magazines).
For photos, 200 dpi ("millions of colors" setting for color pictures,
"gray scales" for gray pictures) is usually good enough.
- Getting the best results depends on the software and hardware used.
Experiment and reserve time for the job! To get a good scan of a
color picture, it is sometimes best to scan with the best possible
resolution (which depends on your hardware, especially the memory of the computer)
and let the software (like Photoshop or the
Gimp ) resize the picture.
Note that for large photos and high resolution, files can get huge, sometimes
hundreds of Megabytes. In practice, scanning at the desired resolution
and letting the scanner resample the picture is good enough and does the job
more efficiently.
|
Where to scan?
 |
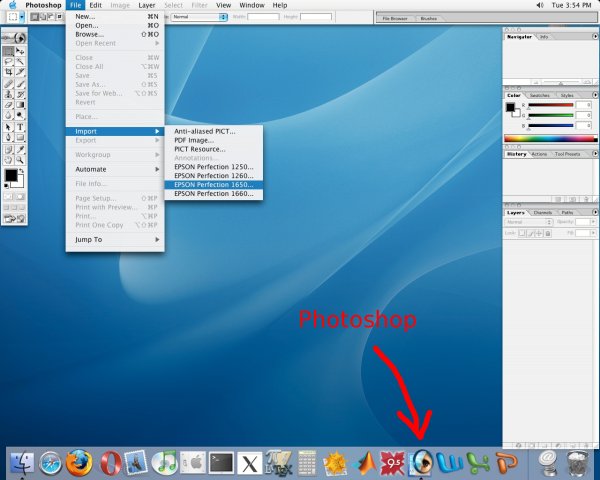
In the Macintosh lab at the basement of the Science Center at
Harvard, there is
a scanner attached at one of the G5 workstations. ou can scan there with Photoshop.
|
If you have a scanner attached to your desktop computer like a
linux box, you can scan from the command line. To scan a text file
in Linux you would use
scanimage --resolution 200 --mode Binary>tmp.pnm
|
To scan a photo with 600 dpi, you would use
scanimage --resolution 200 --mode Color>tmp.pnm
|
and process the .pnm file tmp.pnm file. Of course, you would use
your own shellscripts to have the graphics file in a format
suitable for you. Example:
#!/bin/sh
# scangif file.gif
scanimage --resolution 200 --mode Binary>tmp.pnm
pnmcut 40 190 1600 2100 tmp.pnm >tmp1.pnm
ppmtogif tmp1.pnm>
rm tmp.pnm tmp1.pnm
|
would produce a gif file where the boundaries have
been removed at some place.
|
What software?
- Under PC and Macintosh, Adobe Photoshop is a good choice.
- Under Linux, the programs scanimage, xvscan, xscanimage are available. You can
also scan directly from Gimp.
|
Some Links

